6 Photos
INITIAL STEPS
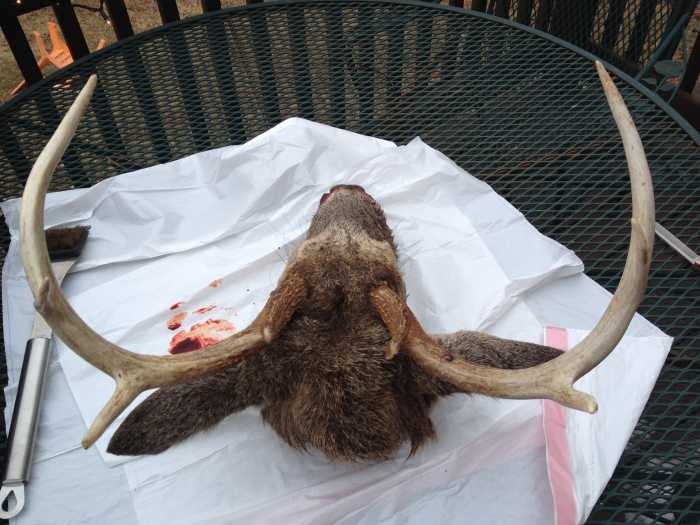
* Cut the deers head off as close to the base of the skull as possible (see pic at the bottom of this article)
* Place the head on a stable object (such as a table), with a sharp knife remove all the hide and as much flesh as possible (including eyeballs).
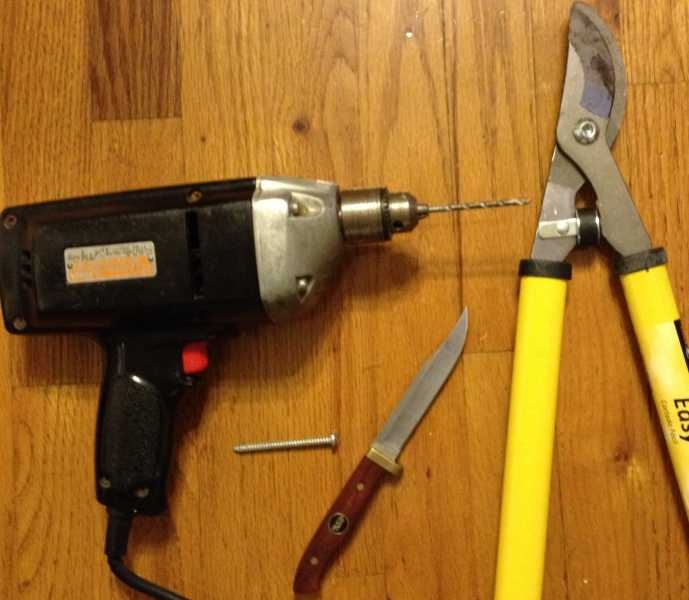
* Remove the lower jawbone by using your sharp knife or prunning shears(pictured below). Cut through the tendon where the lower jaw connects to the skull.
* Remove the tongue completely.
* You will find that the brain matter can most easily be removed once you have boiled the skull for the the first 30 minutes.
(If you want to "age" the deer save this lower jaw)
NOW YOUR READY TO BOIL THE SKULL
**Items needed for this & final process**
1) A deep pot that the skull will fit into where it can submerged in water.
2) A box of "washing powder" (find this @ walmart in the baking soda section) use 1 cup per gallon of water when boiling.
3) Dish washing liquid
4) Toothbrush
5) To whiten the skull after the boiling is done you will need a 2 part mix from your local beauty supply place- "Basic White" 40% and a powder that mixes with it to form a paste. Also while you're there asked for a brush to apply this solution(all pictured below). Dont worry it was my first visit to the beauty supply place as well. The ladies that worked there were more than willing to help me locate what I needed.
BOILING...
* Bring the pot of water to a boil (I did this on my stove top, but you can use a wood stove or outdoor grill burner if it will get hot enough to boil the water) then add the washing powder.
* Lower the skull into the boling water till the skull is completely submerged.
* Boil the skull for 30 minutes then remove it and change the water and washing powder(this is the best time to remove the brain using a drill bit if needed and remove any nasal cavity material with your knife)
* Boil the skull again in the fresh solution for another 30 minutes.
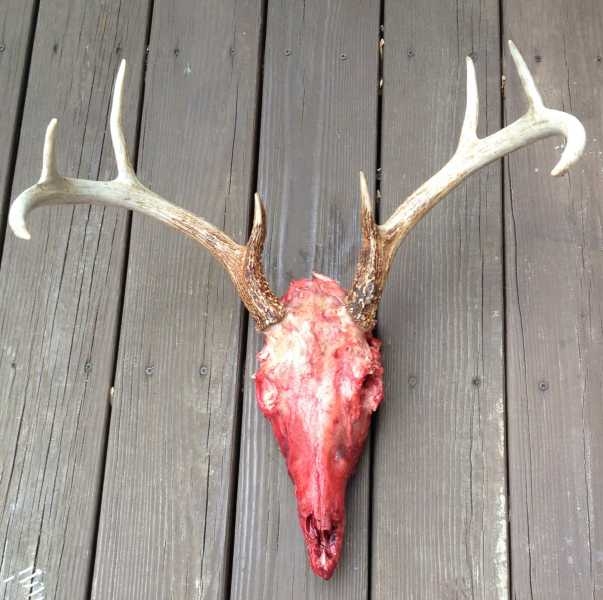
* Remove the skull after the final boil and handle it with care because it will be more brittle.
* Place the skull in a warm water/ dish washing liquid soulution and using a toothbrush scrub the leftover flesh and oils off the skull. NOW LET DRY OVERNIGHT
FINAL STEP
* Mix the whitening solution together following the instructions and brush it all over the skull making sure not to get any on the antler bases.(you can coat the upper teeth if you want an "all white" look)
* Store the solution coated skull in a garbage bag for 12 hours.
* Rinse the skull completely and there you have it!
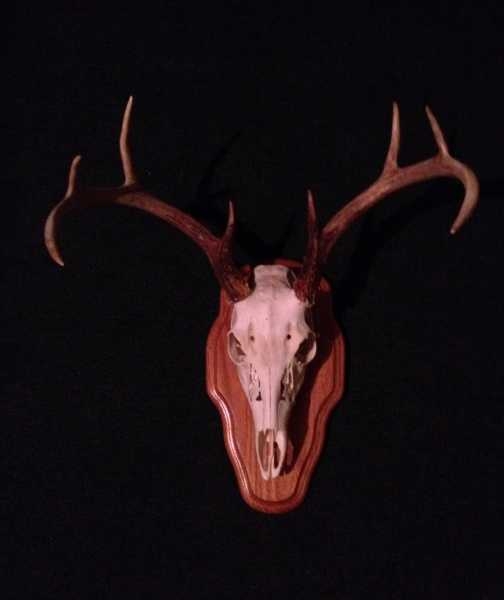
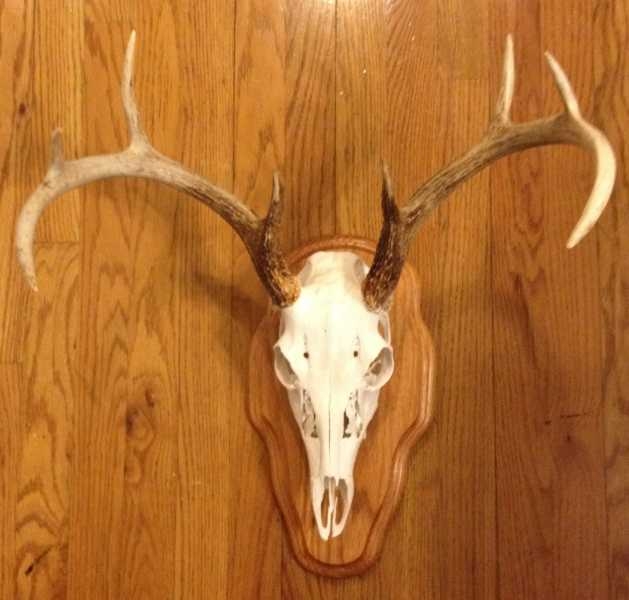
Cogratulations, look what you have accomplished!!
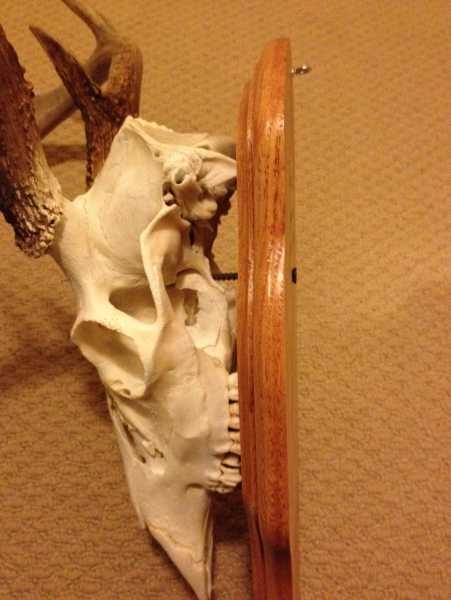
The skull can be displayed any way you desire. I chose to mount it on a plaque that I obtained from my local taxidermist. I simply drilled a 4 inch screw through the back of the plaque and into the base of the skull(pictured below)...Looks great and I take pride in having done it myself, not to mention the $$ I saved.
**If you would rather have it professionally done I recommend Billy Lester of North Fork Skullworks 540-315-5557 or click below**

Jeff Phillips
INITIAL STEPS
* Cut the deers head off as close to the base of the skull as possible (see pic at the bottom of this article)
* Place the head on a stable object (such as a table), with a sharp knife remove all the hide and as much flesh as possible (including eyeballs).
* Remove the lower jawbone by using your sharp knife or prunning shears(pictured below). Cut through the tendon where the lower jaw connects to the skull.
* Remove the tongue completely.
* You will find that the brain matter can most easily be removed once you have boiled the skull for the the first 30 minutes.
(If you want to "age" the deer save this lower jaw)
NOW YOUR READY TO BOIL THE SKULL
**Items needed for this & final process**
1) A deep pot that the skull will fit into where it can submerged in water.
2) A box of "washing powder" (find this @ walmart in the baking soda section) use 1 cup per gallon of water when boiling.
3) Dish washing liquid
4) Toothbrush
5) To whiten the skull after the boiling is done you will need a 2 part mix from your local beauty supply place- "Basic White" 40% and a powder that mixes with it to form a paste. Also while you're there asked for a brush to apply this solution(all pictured below). Dont worry it was my first visit to the beauty supply place as well. The ladies that worked there were more than willing to help me locate what I needed.
BOILING...
* Bring the pot of water to a boil (I did this on my stove top, but you can use a wood stove or outdoor grill burner if it will get hot enough to boil the water) then add the washing powder.
* Lower the skull into the boling water till the skull is completely submerged.
* Boil the skull for 30 minutes then remove it and change the water and washing powder(this is the best time to remove the brain using a drill bit if needed and remove any nasal cavity material with your knife)
* Boil the skull again in the fresh solution for another 30 minutes.
* Remove the skull after the final boil and handle it with care because it will be more brittle.
* Place the skull in a warm water/ dish washing liquid soulution and using a toothbrush scrub the leftover flesh and oils off the skull. NOW LET DRY OVERNIGHT
FINAL STEP
* Mix the whitening solution together following the instructions and brush it all over the skull making sure not to get any on the antler bases.(you can coat the upper teeth if you want an "all white" look)
* Store the solution coated skull in a garbage bag for 12 hours.
* Rinse the skull completely and there you have it!
Cogratulations, look what you have accomplished!!
The skull can be displayed any way you desire. I chose to mount it on a plaque that I obtained from my local taxidermist. I simply drilled a 4 inch screw through the back of the plaque and into the base of the skull(pictured below)...Looks great and I take pride in having done it myself, not to mention the $$ I saved.
**If you would rather have it professionally done I recommend Billy Lester of North Fork Skullworks 540-315-5557 or click below**
Jeff Phillips